Key Takeaways:
- Freeze-thaw cycles loosen shingle adhesive seals, causing cracks, lifts, and tears that become visible only after ice melts.
- Ice dams form when attic heat melts roof snow that refreezes at eaves, forcing water under shingles and into living spaces.
- Document all thaw damage with photos and videos within 24-48 hours to preserve insurance claim viability and prevent disputes.
- Clogged gutters and damaged drip edges allow water to wick under roofing materials, causing rot in roof decks and fascia boards.
- Professional spring inspections extend roof lifespan and catch problems early when repairs cost hundreds instead of thousands.
Spring thaw reveals what winter hides. As temperatures rise and snow melts across Illinois, damage accumulated during months of freeze-thaw cycling becomes visible. Water that was locked in ice begins moving through your home's exterior systems, exposing weaknesses in roofing, gutters, siding, and structural components.
This guide covers the critical inspection points every Illinois homeowner should check after winter ends. Early detection prevents minor issues from becoming major repairs.
What Does the Spring Thaw Mean for Illinois Homes and Buildings?
The spring thaw is a transitional period when frozen precipitation melts and water begins flowing through drainage systems. For Illinois homes, this phase exposes accumulated winter damage and tests the integrity of every exterior component.
Why does freeze–thaw cycling create structural stress in Illinois climates?
Freeze-thaw cycles cause water to expand as it freezes and contract as it melts. Heavy snow, ice buildup, and frequent freeze-thaw cycles subject roofing materials to immense stress. The constant expansion and contraction loosen adhesive seals on shingles, causing them to crack, lift, or tear. This cycling occurs dozens of times throughout an Illinois winter, weakening materials with each repetition.
Materials that appear intact on the surface may have microscopic cracks or separation points. These small failures become major problems when meltwater finds entry points during the thaw.
How does melting snow expose damage that formed during winter?
Winter damage often goes unnoticed until ice melts and water begins penetrating the home. Frozen water acts as a temporary seal, masking cracks, gaps, and compromised flashing. When temperatures rise, meltwater flows through these hidden vulnerabilities.
Signs of damage appear as water stains on ceilings, damp insulation in attics, or active drips in living spaces. The thaw transforms invisible winter damage into visible problems requiring immediate attention.
Which Chicagoland weather patterns increase thaw-related risks?
Illinois' climate swings dramatically from brutal freeze-thaw winters to severe summer storms. The Chicagoland area experiences rapid temperature fluctuations in late winter and early spring, creating multiple freeze-thaw events. A warm afternoon followed by freezing overnight temperatures compounds stress on building materials.
Wind-driven winter storms deposit snow unevenly across roofs, creating concentrated load points. Areas with south-facing exposures thaw faster, while north-facing sections remain frozen, causing differential movement in roofing systems.
What Roofing Issues Should You Look for After the Winter Melt?
Roofing systems take the brunt of winter damage. Start your post-thaw inspection here, as roof failures lead to cascading problems throughout the home.
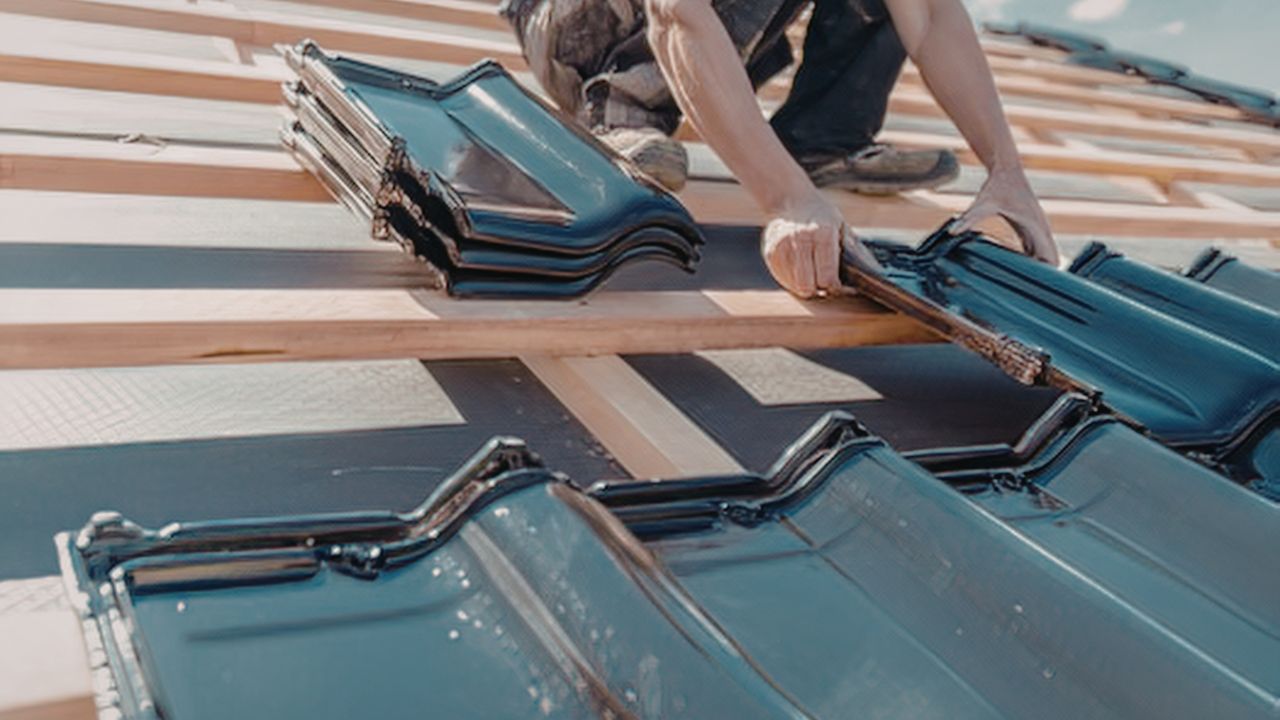
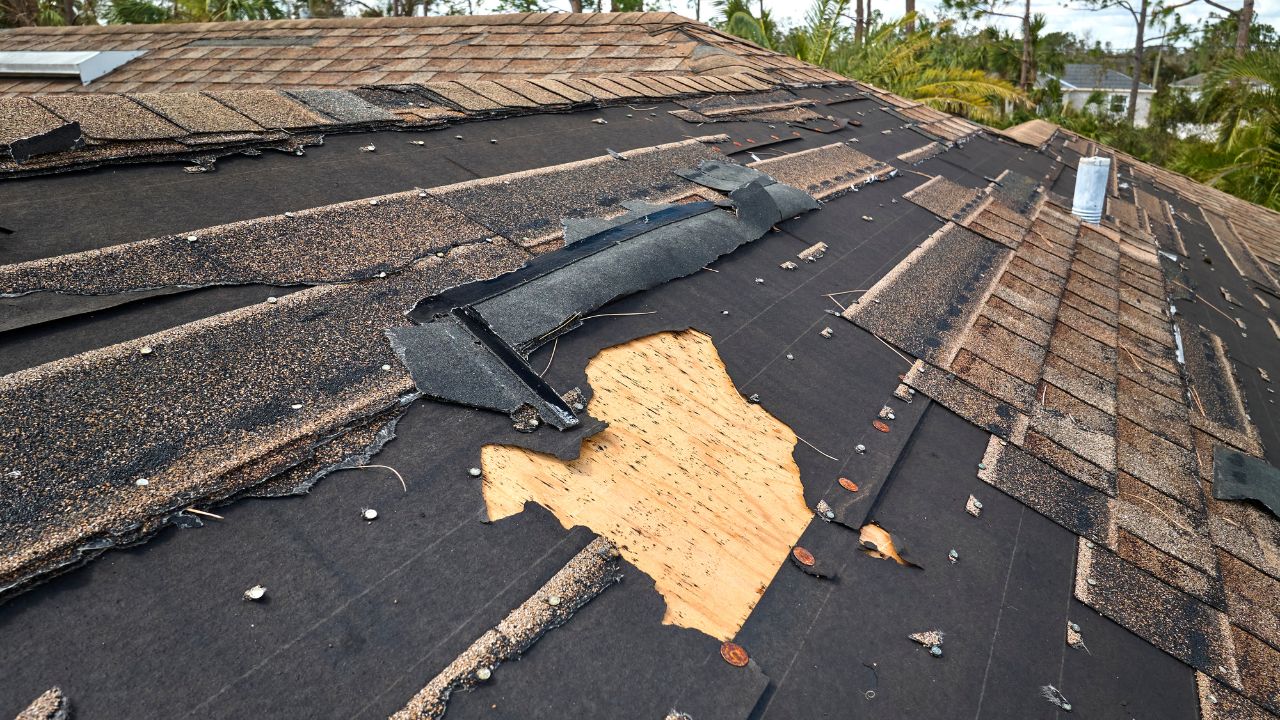
What signs indicate shingle or membrane damage from ice and snow?
Look for missing shingles, curled edges, and excessive granule loss during ground-level inspection. High winds during winter storms can tear shingles completely off the roof. Granule loss exposes the roof's underlayers to UV damage and accelerates deterioration.
Check valleys and transition points where ice accumulates. These areas experience the most stress and show damage first. Cracked or brittle shingles indicate material fatigue from repeated freeze-thaw cycling.
How do you check for roof leaks triggered by melting snow?
Ice dams force meltwater to back up and seep under shingles, leading to leaks and water stains on attic ceilings or walls. Inspect your attic on a sunny day after significant snowmelt. Look for water stains, damp insulation, or active drips.
Check interior ceilings in top-floor rooms for brown or yellow staining. Follow stain patterns to identify entry points. Fresh leaks appear as darker, wet areas, while older damage shows as dried rings or discoloration.
What does ice dam residue reveal about underlying roof problems?
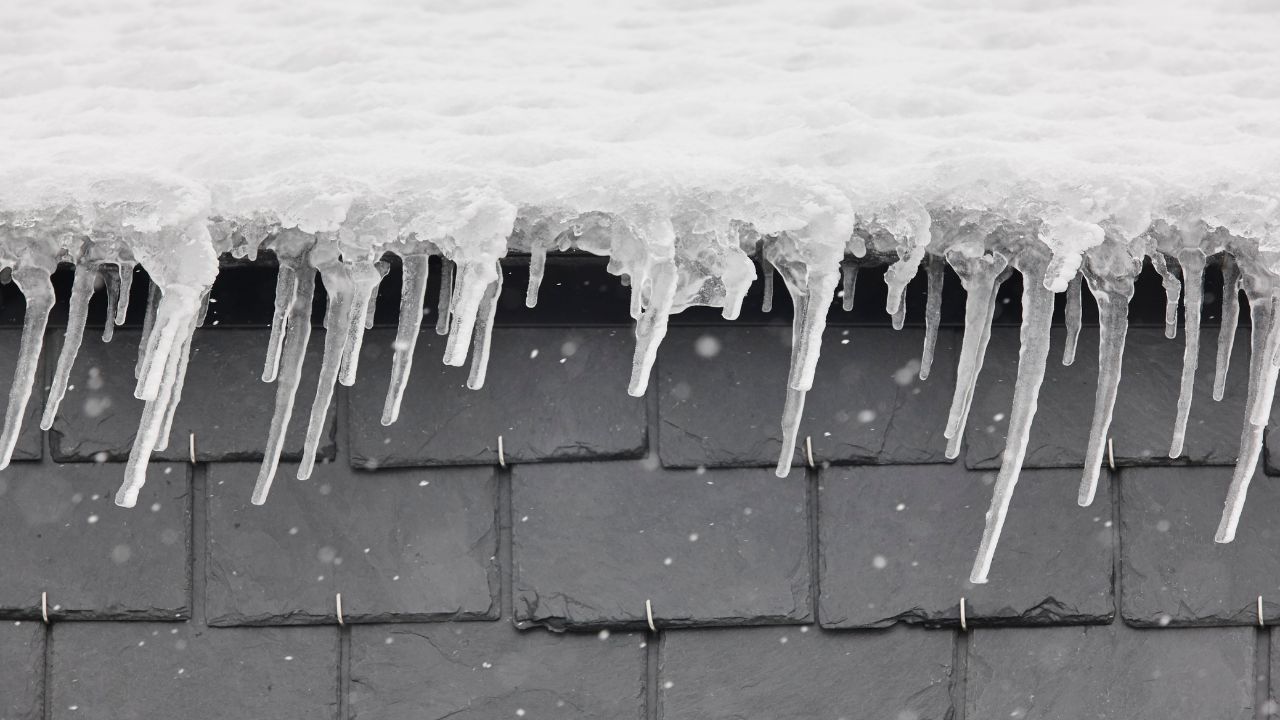
Ice dams form when heat escaping from the attic melts snow on the upper roof, which then refreezes at the colder eaves, creating a barrier. Look for signs of thick ice buildup along roof edges and check for interior water damage. Residual ice patterns show where heat loss occurs.
Icicles along the roof edge indicate active ice dam conditions. The location and size of ice formations reveal inadequate insulation or ventilation in specific attic zones. These underlying issues must be addressed to prevent recurring problems.
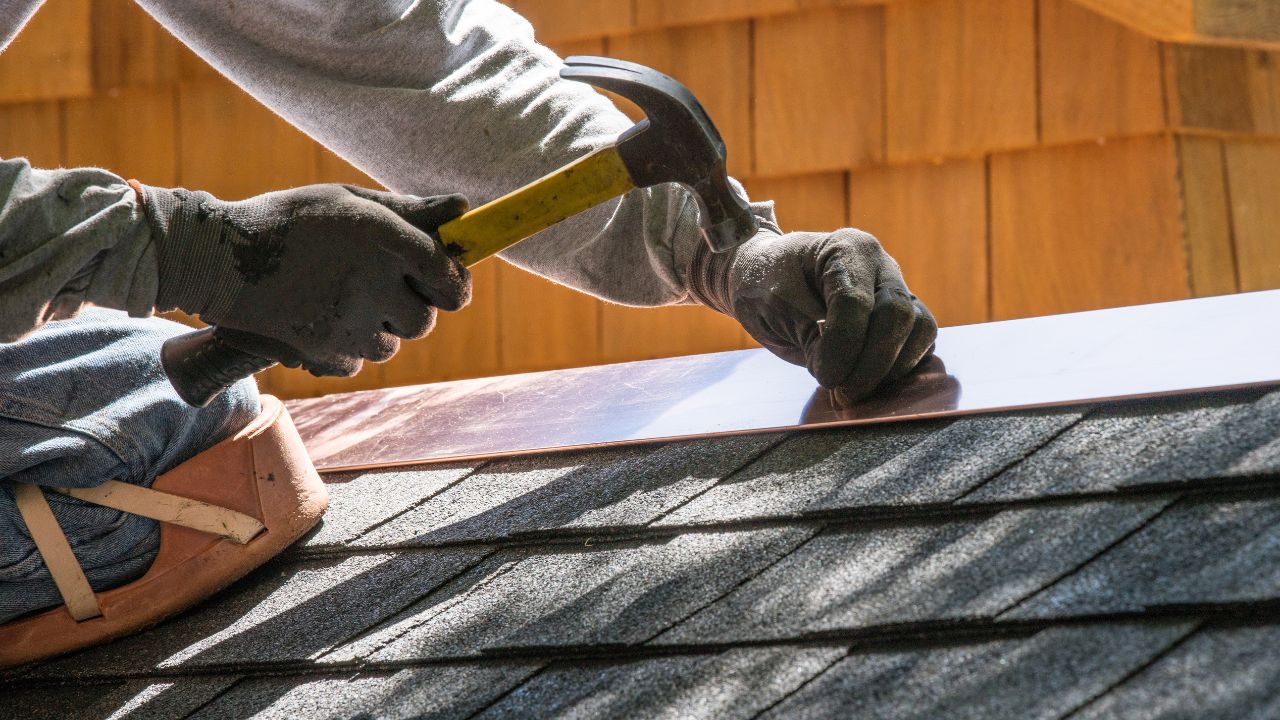
How do you identify flashing, vent boot, or seal failures after a thaw?
Winter weather can crack or rust flashing around chimneys, vents, and skylights, creating pathways for water. Examine all flashing to ensure it remains firmly attached and free of visible cracks or rust spots. Pay special attention to step flashing along chimney walls and base flashing at penetration points.
Check the drip edge—metal flashing installed along eaves and rakes—whose purpose is to direct water away from the fascia and prevent it from getting underneath roofing materials. A damaged or loose drip edge allows water to wick back under shingles, leading to rot in the roof deck and fascia, and contributing to ice dam formation.
What Should You Inspect on Your Gutters and Drainage Systems After the Thaw?
Gutters and downspouts channel water away from your foundation. Winter damage to these systems causes water to pool against the home's exterior.
How can you tell if heavy snow warped or cracked your gutters?
Heavy snow accumulation adds significant weight to roof structures and gutter systems. Look for sagging sections, pulled-away hangers, or visible cracks in gutter troughs. Ice-filled gutters can weigh hundreds of pounds, stressing attachment points beyond their design limits.
Run your hand along gutter seams to feel for separation or gaps. Check end caps for cracks or detachment. Warped gutters won't drain properly even after repairs, requiring replacement to restore function.
What drainage issues show up when snowmelt backs up?
Clogged gutters lead to the formation of ice dams and overflow during rapid snowmelt. Tree debris can clog gutters and downspouts, leading to drainage issues. During the thaw, watch for water spilling over gutter edges rather than flowing through downspouts.
Ground-level pooling near the foundation indicates blocked or disconnected downspouts. Water should discharge at least six feet from the foundation. Shorter discharge creates soil saturation and potential basement seepage.
How do you identify improper gutter pitch or downspout blockages?
Clean gutters and downspouts ensure proper drainage of meltwater and rain and prevent ice dam formation. Pour water into gutters and watch the flow pattern. Water should move steadily toward downspouts without pooling in sections.
Gutters require a minimum pitch of one-quarter inch per ten feet. Sections that hold standing water after a pour test need re-pitching or replacement. Remove downspout extensions and flush with a hose to clear ice remnants and debris.
How Does the Spring Thaw Affect Your Home's Siding and Exterior Walls?
Siding expands and contracts with temperature changes. Winter's extreme cold, followed by rapid thaw, creates stress cracks and moisture intrusion points.
What do siding cracks, warping, or moisture staining indicate? Thaw damage.
Inspect siding for horizontal cracks near attachment points, warped boards that no longer lie flat, and dark staining around seams. Freeze-thaw cycling causes fasteners to loosen and boards to separate from the substrate.
Vinyl siding becomes brittle in extreme cold and can crack when ice accumulates behind it. Wood siding absorbs moisture during thaws and shows swelling or cupping. Fiber cement siding develops spalling where water penetrated the surface and froze.
How does freeze expansion affect trim, fascia, and soffits?
Trim boards exposed to weather show splitting along grain lines. Fascia boards behind failed gutters absorb water and rot from repeated freeze-thaw exposure. Soffit panels crack when ice forms in the ventilation gaps.
Check corner boards and window trim for gaps where caulk has failed. These openings allow water infiltration behind siding. Painted trim shows peeling or bubbling where moisture is trapped beneath the surface.
Which stains or soft spots signal hidden moisture intrusion?
Dark stains below windows or along horizontal seams indicate active water intrusion. Press with your hand to check for soft spots or sponginess. Solid siding should feel rigid and firm.
Look for rust stains around nails or fasteners, which indicate prolonged moisture exposure. White or gray efflorescence (mineral deposits) shows where water repeatedly wicks through materials. These signs point to serious moisture problems requiring immediate attention.
What Window and Door Problems Become Noticeable After the Winter Thaw?
Windows and doors contract in cold weather, creating temporary seals. As temperatures rise, failed components become apparent through drafts and condensation.
Why do drafts and fogging worsen during early spring?
Temperature differentials between inside and outside air become more noticeable during spring. Failed weatherstripping allows air infiltration. Double-pane windows with broken seals show condensation between the glass layers as the temperature gap increases.
Run your hand around the window and door perimeters on a windy day to feel for air movement. Light a candle and watch for flame movement near the edges. These simple tests reveal air leakage requiring sealing.
What indicates that seals or frames cracked during winter freezing?
Look for water stains on window sills or along door thresholds. Cracked glazing compound around panes allows water infiltration. Wood frames show swelling, paint failure, or separation at joints where water penetrated and froze.
Aluminum and vinyl frames develop stress cracks at corners where expansion and contraction occur. These cracks compromise the frame's weatherproofing ability. Test window operation—difficult opening or closing indicates frame distortion from freeze-thaw movement.
How can thawing reveal gaps around doors and weatherstripping failure?
Weatherstripping compresses and degrades over time. Insert a sheet of paper in the door jamb and close the door. If you can pull the paper out easily, the seal is insufficient. Repeat this test at multiple points around the door perimeter.
Check door sweeps for gaps when the door is closed. Light visible beneath the door indicates that air and water can enter. Threshold weatherstripping should make firm contact with the door bottom across the entire width.
How Can Melting Snow Impact Your Foundation, Basement, and Landscaping?
Ground saturation during spring thaw creates hydrostatic pressure against foundation walls. This pressure finds weaknesses in waterproofing and causes seepage.
What signs point to frost heave or soil shifting around the home?
Walk the perimeter and look for areas where soil pulled away from the foundation or where the ground appears uneven. Frost heave causes soil to rise during freezing and settle during thaw, creating voids.
Check for cracks in concrete slabs, walkways, or driveways. Uneven settling indicates subsurface movement from freeze-thaw action. Foundation walls may show horizontal cracks or inward bowing from soil pressure.
How can you detect basement seepage during spring melt?
Inspect basement walls and floors during active snowmelt. Look for damp spots, water stains, or efflorescence on concrete surfaces. The musty odor indicates moisture problems even when visible water isn't present.
Check corners where walls meet floors—water appears here first during heavy saturation. Test walls by taping plastic sheeting over suspect areas. Condensation on the plastic's interior surface indicates moisture moving through the wall.
Which pooling patterns indicate a grading or drainage issue?
Ground should slope away from the foundation at a minimum grade of six inches over ten feet. Water pooling within ten feet of the house indicates improper grading. These areas become saturated during thaw and increase basement seepage risk.
Watch for depressions in landscaping where water collects. Low spots channel runoff toward the foundation rather than away from it. Downspout discharge areas should direct water to natural drainage paths or properly graded terrain.
What Should You Look for Inside Your Attic After the Thaw?
Attic inspection reveals roof system performance. Moisture, ventilation issues, and insulation damage show how well the roof weathered winter.
How do you recognize moisture buildup or attic frost leftover from winter?
Check for water stains on attic ceilings or walls and inspect for interior water damage. Look for frost on the roof deck sheathing or on nail points penetrating from the exterior. This frost indicates warm, moist air entering the attic space.
Inspect rafters or beams for sagging, which signals structural stress from heavy snow. Damp insulation appears darker and compressed compared to dry material. Mold growth appears as black or green patches on wood surfaces.
What attic ventilation problems appear during early spring?
Adequate attic ventilation prevents heat from escaping into the attic space, which stops the uneven melting of snow that leads to ice dam formation. Proper ventilation reduces moisture buildup and prevents mold.
Check soffit vents for blockage from insulation or debris. Ridge vents should show daylight and airflow. Calculate ventilation adequacy: you need one square foot of ventilation per 150 square feet of attic space, split equally between intake (soffit) and exhaust (ridge) vents.
How do you identify insulation damage caused by ice dams?
Proper insulation keeps heat in the living space and out of the attic, which is crucial for maintaining a cold roof deck—the foundation of ice dam prevention. Look for compressed, wet, or displaced insulation.
Insulation loses R-value when wet. Compressed insulation indicates it was saturated and dried. Check areas above exterior walls where ice dams typically form. Dark staining or water marks on insulation indicate past water intrusion requiring investigation.
What Safety Hazards Can Appear When Snow and Ice Begin to Melt?
Thaw conditions create temporary hazards. Awareness prevents accidents and identifies conditions requiring professional intervention.
Which electrical risks develop when moisture enters exterior systems?
Water contact with electrical components creates shock and fire hazards. Check exterior outlets, light fixtures, and service panels for signs of water intrusion. Tripped breakers or non-functioning outlets after a thaw indicate moisture problems.
Never inspect electrical components while standing on wet ground or touching wet surfaces. Look for rust or corrosion in panel boxes. Water stains near electrical equipment require immediate evaluation before use.
How does post-thaw dampness increase the risk of mold growth?
Water penetration can lead to mold growth and further structural weakening. Mold develops within 24-48 hours in damp conditions. Look for musty odors, visible growth on surfaces, or respiratory irritation when in affected areas.
Damp insulation, wet drywall, and saturated wood provide ideal conditions for mold. Address water intrusion immediately to prevent colony establishment. Professional remediation becomes necessary once mold spreads beyond small surface areas.
When is climbing ladders or roofs unsafe during spring thaw conditions?
DIY repairs should be avoided as they can be dangerous and may affect an insurance claim. Melting snow creates slippery surfaces and unstable footing. Ice patches remain in shaded areas long after sunny sections clear.
Ladder placement on soft, thawed ground provides inadequate stability. Gutters weakened by winter damage may collapse under the weight. Professional contractors have proper equipment, fall protection, and insurance coverage for high-risk inspection work.
What Should You Do First If You Discover Damage During Spring Thaw Inspection?
Immediate response minimizes damage and preserves insurance claim viability. Follow this action sequence when you find problems.
What immediate steps should Illinois homeowners take in the first 24–48 hours?
The first hour response is critical: ensure family safety, document the damage with photos and videos for insurance claims, and call a professional for emergency leak containment, like tarping. Move valuables away from active leak areas.
Place buckets under drips and use towels to prevent water spread. Turn off electricity to affected areas if water contacts electrical systems. Contact your insurance company within 24 hours to report damage and begin the claims process.
How should you document thaw-related damage for possible insurance claims?
Document the damage with photos and videos for insurance claims. Photograph damage from multiple angles showing context and close-up details. Include date stamps if your camera has this feature.
Video walk-throughs capture the damage extent better than still photos alone. Photograph items damaged by water, including furniture, flooring, and personal property. Keep damaged materials until the insurance adjuster inspects them—premature disposal can complicate claims.
Which issues require urgent professional attention vs. temporary homeowner fixes?
Water penetration requires immediate professional attention, as it can lead to mold growth and further structural weakening. Active leaks, structural damage, and electrical hazards demand immediate professional response.
DIY repairs should be avoided as they can be dangerous and may hurt an insurance claim. Temporary measures like bucket placement and tarping are acceptable until professionals arrive. Never attempt roof work, electrical repairs, or structural stabilization without proper expertise and equipment.
How Can a Professional Exterior Inspection Prevent Long-Term Damage?
Professional inspections identify hidden damage and provide actionable repair plans. Expertise and specialized tools reveal problems homeowners miss.
What tools do roofing and exterior professionals use to detect thaw damage?
Professionals use thermal imaging cameras to detect moisture in walls and roofs, moisture meters to measure water content in materials, and drones to safely inspect roofs without walking on them. Borescopes allow visual inspection inside wall cavities without demolition.
Pressure testing identifies leaks in flashing and sealant joints. Infrared scanning reveals insulation voids and air leakage paths. These diagnostic tools provide objective data about damage extent and help prioritize repairs.
Why is early spring the ideal time for roofing, siding, and gutter assessments?
The spring thaw is the critical time to inspect for damage accumulated over the cold months. Spring is primarily a damage assessment phase, while fall is preventative maintenance. Early detection allows repairs before the summer storm season.
Material availability and contractor scheduling improve in the spring compared to emergency situations. Insurance claims filed in spring have higher success rates when damage is fresh and clearly winter-related. Early repairs prevent minor issues from becoming major failures.
How does expert inspection help extend the life of your home's exterior systems?
By diligently inspecting for winter damage in the spring, homeowners can significantly extend the lifespan of their roof and prevent costly emergency repairs. Professional assessment identifies problems at early stages when repairs are simpler and less expensive.
Comprehensive inspection reports provide maintenance roadmaps for the coming year. Documentation of current conditions helps track deterioration over time. Regular professional inspection catches problems before they compromise structural integrity.
How Do You Choose the Right Illinois Contractor for Post-Thaw Repairs?
Contractor selection determines repair quality and project success. Focus on qualifications, experience, and service breadth.
What licensing and local experience should you look for in Illinois?
Verify contractors hold proper Illinois licenses and insurance coverage. Local contractors understand regional weather patterns and building code requirements. Check licenses through the Illinois Department of Financial and Professional Regulation.
Ask for references from recent projects in your area. Local experience means familiarity with common Illinois-specific problems like ice dam formation and freeze-thaw damage. Established local presence indicates stability and accountability.
Why is choosing a multi-service provider better for thaw-related damage?
Roofing, siding, gutters, and window services are all interconnected when addressing thaw-related damage. A single contractor coordinating multiple repairs ensures proper integration between systems. This approach prevents gaps in weatherproofing and reduces scheduling complexity.
Multi-service providers identify how damage in one system affects others. They provide comprehensive solutions rather than isolated repairs. Single-source accountability simplifies warranty coverage and future service calls.
How do warranties, materials, and communication reflect contractor quality?
Quality contractors offer workmanship warranties beyond manufacturer material warranties. Ask for written warranty terms covering labor and materials. Understand warranty limitations and claim procedures before signing contracts.
Material selection should match your home's existing systems and climate requirements. Contractors should explain options and recommend solutions based on your budget and needs. Clear communication throughout the project, including updates on delays or discoveries, indicates professional operation.
What Are the Key Areas Illinois Homeowners Should Prioritize Before Spring Ends?
Spring inspection lays the groundwork for summer weather preparedness. Focus on these critical systems to maximize protection.
Which exterior systems should you re-check throughout the spring season?
Spring inspection focus should emphasize shingle and flashing damage assessment. Fall inspection emphasizes gutters, drainage, and attic ventilation maintenance. Key priority areas include roofing systems, gutters and drainage, and attic ventilation and insulation.
Re-inspect after major rain events to verify repairs hold, and no new leaks develop. Check areas that showed minor damage initially—small problems often worsen as spring progresses. Monitor foundation areas where initial seepage occurred.
Why does consistent thaw inspection help reduce future repair costs?
Proactive seasonal inspection can significantly extend roof lifespan, prevent costly emergency repairs, and ensure homes remain safe, dry, and comfortable through Illinois' unpredictable weather. Small repairs cost hundreds; major damage costs thousands.
Early intervention stops minor problems before they cascade into structural issues. Regular inspection creates maintenance records that support insurance claims and increase home value. Prevention always costs less than emergency remediation and reconstruction.
Ready to Protect Your Illinois Home from Spring Thaw Damage?
Spring thaw damage doesn't wait for convenient timing. The longer you delay inspection and repairs, the more extensive and expensive the problems become. Advanced Roofing Inc. specializes in post-winter damage assessment and comprehensive exterior restoration for Illinois homeowners. Our experienced team understands the unique challenges of freeze-thaw cycling and provides multi-service solutions for roofing, siding, gutters, and more.
Don't let winter damage compromise your home's integrity. Contact Advanced Roofing Inc. today for a professional spring thaw inspection. We'll identify hidden problems, provide detailed repair recommendations, and restore your home's protection before summer storms arrive. Your home weathered the Illinois winter—now give it the expert care it deserves.