Key Takeaways:
- Drip edge directs water away from fascia and prevents it from getting underneath roofing materials, protecting roof decking from rot and moisture damage.
- Damaged or loose drip edge contributes directly to ice dam formation by allowing water to wick backwards and freeze at cold eaves.
- Freeze-thaw cycles loosen drip edge fasteners and crack sealants—each winter progressively damages edge systems until complete failure occurs.
- Fall is the ideal inspection time because ensuring the drip edge is securely fastened before winter prevents costly emergency repairs during storms.
- Water staining on fascia, gutter overflow patterns, and lifted metal sections are visible signs indicating drip edge failure requiring immediate repair.
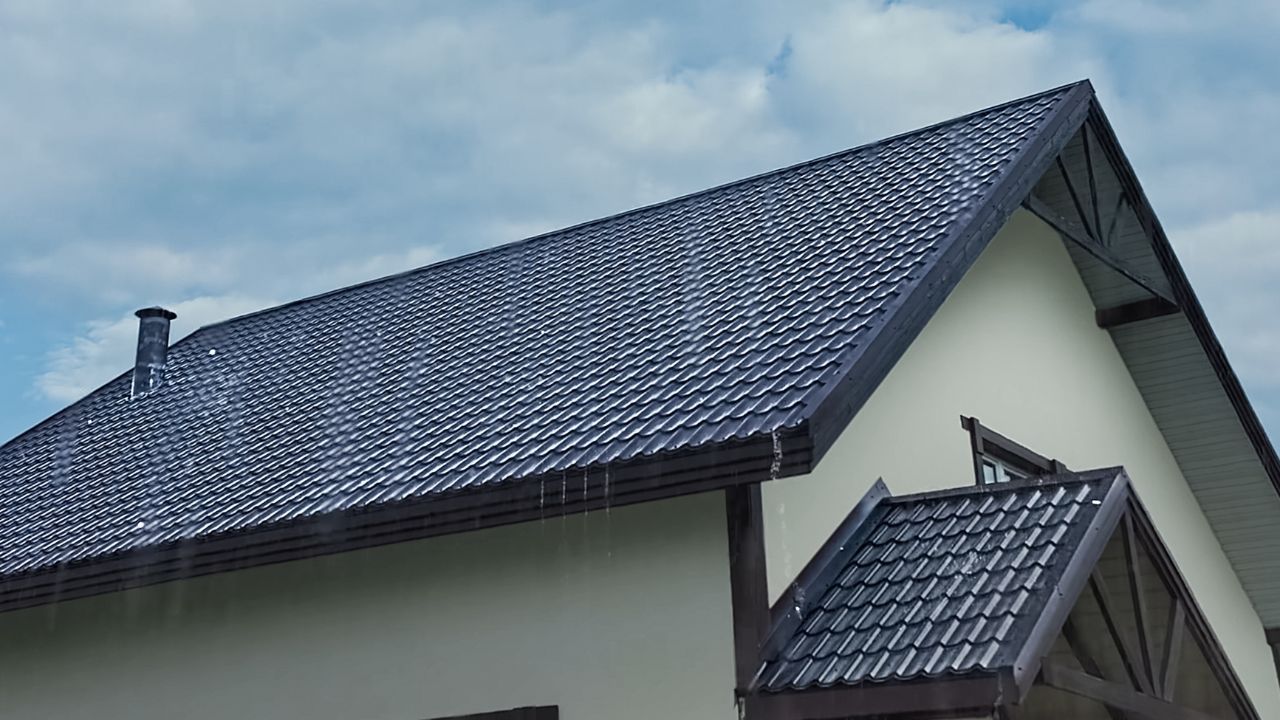
Drip edge seems minor until it fails. This metal flashing installed along eaves and rakes protects your roof's most vulnerable perimeter. A damaged or loose drip edge can allow water to wick back under shingles, leading to rot in the roof deck and fascia, and contributing to ice buildup and ice dams. Fall inspection catches problems before winter stress exposes them.
The fall season is the ideal time for a final, detailed inspection before winter sets in. Ensuring the drip edge is securely fastened and properly channels water is a simple yet vital step in the fall maintenance process to prepare the roof for the coming snow and ice. This guide covers what to check, when to repair, and why this small component prevents major winter damage.
What Is Roof Drip Edge and Why Is It Critical for Illinois Winter Conditions?
The purpose of the drip edge is to direct water away from the fascia and prevent it from getting underneath the roofing materials. This L-shaped or T-shaped metal flashing mounts along roof edges, creating a defined drip line that protects underlying structures. Without it, water follows the roof edge backwards, infiltrating vulnerable areas.
How does drip edge prevent water intrusion at the roof perimeter?
The drip edge creates a physical barrier, forcing water to drip away from the roof edge rather than running back under shingles. Water follows the path of least resistance—without a drip edge, that path leads directly under roofing materials into the roof deck.
Capillary action draws water upward and backwards along horizontal surfaces. Drip edge breaks this action by creating an air gap. Water reaching the edge must fall rather than wick backwards. This simple mechanical barrier prevents thousands of dollars in hidden water damage.
How does drip edge protect fascia, soffits, and roof decking from runoff?
A damaged or loose drip edge allows water to wick back under shingles, causing rot in the roof deck and fascia. Fascia boards mount behind the drip edge—when flashing fails, water saturates this wood continuously. Rot spreads from the fascia into the roof decking and soffit panels.
Roof decking rot starts at the edges and progresses inward. Edge rot compromises shingle attachment, creating a cascading failure. Soffits below damaged drip edges show water staining, peeling paint, and eventual structural failure. Proper drip edge keeps water off all these components, directing it into gutters instead.
Why does drip edge performance matter more in cold, wet Illinois winters?
A damaged or loose drip edge contributes to the formation of ice buildup and ice dams. Illinois winters combine the worst conditions—heavy precipitation, freeze-thaw cycling, and sustained cold. Water that wicks behind shingles freezes, expanding and creating gaps for more infiltration.
Ice dams form when meltwater reaches cold eaves and refreezes. A failed drip edge provides the perfect surface for ice formation—water pools against fascia, freezes, and builds backwards up the roof. Each freeze-thaw cycle worsens the damage. Summer moisture problems become winter catastrophes without proper edge protection.
What Fall and Pre-Winter Weather Patterns in Illinois Stress the Drip Edge?
Heavy snow, ice buildup, and frequent freeze-thaw cycles subject roofing materials to immense stress. Fall weather tests the drip edge before winter arrives. Cold rain, early frost, and temperature swings reveal weaknesses that will fail under snow load.
How do wind-driven rains reveal early failures in the roof edge system?
Wind-driven rain hits roof edges at angles gravity alone never creates. Horizontal rain finds every gap in edge flashing. Inspect and repair shingles and flashing to seal all potential entry points for water and reinforce the roof's defence against wind-driven rain and freeze-thaw cycles.
Watch for water staining on the fascia during fall storms. Wind pushes water behind the failed drip edge, leaving obvious marks. Check after storms with sustained winds above 25 mph—these conditions simulate winter's wind-driven snow. Water infiltration during fall rain becomes ice infiltration during winter storms.
How does freeze–thaw expansion affect fasteners, seams, and metal edge pieces?
The constant expansion and contraction from freeze-thaw cycles can loosen the adhesive seals on shingles, causing them to crack, lift, or tear. Drip edge fasteners experience this same cycling. Metal expands in heat and contracts in cold—fastener holes enlarge, seams separate, and sealants crack.
Winter weather can crack or rust flashing, creating pathways for water. Each freeze-thaw cycle works the fasteners slightly looser. After several winters, the drip edge may appear intact but no longer holds securely. Fall inspection reveals loose sections before winter stress tears them completely free.
How do early snowfalls and ice formation expose existing edge vulnerabilities?
Damage often goes unnoticed until the ice melts and water begins to penetrate the home. Early snow in October or November creates temporary ice dams, showing where problems will occur all winter. These preview events demonstrate drainage patterns and accumulation points.
Watch where ice forms first during early cold snaps. These areas have underlying issues—poor insulation, inadequate ventilation, or damaged drip edge. First freeze locations become problem zones all winter. Address them in the fall before sustained cold makes repairs difficult and ice damage becomes continuous.
Which Roofing Components Work With the Drip Edge to Manage Water at the Eaves?
Clean gutters and downspouts ensure proper drainage of meltwater and rain and prevent the formation of ice dams, which are caused by clogged gutters. Drip edge doesn't work alone—it integrates with multiple components, creating a complete edge system.
How do underlayment and starter shingles tie into the drip edge plane?
Underlayment extends over the drip edge, creating a continuous waterproof membrane. Starter shingles mount atop the underlayment, overlapping the drip edge by several inches. This layered system provides redundant protection—if one component fails, others continue protecting the structure.
Proper installation sequences matter. Drip edge mounts to the roof decking first. Underlayment laps over the drip edge. Starter shingles cover both. Each layer directs water downward and outward. Reversed installation—common in poor workmanship—channels water backwards into vulnerable areas. Fall inspection verifies proper sequencing.
What role do fascia boards, soffits, and rake edges play in fall inspections?
Fascia boards mount behind the drip edge, providing an attachment surface and protecting rafter ends. Soffits close the space below rafters between fascia and exterior walls. Rake edges—the gable end equivalents of eaves—need drip edge protection equally.
Inspect the fascia for rot, soft spots, or water staining, indicating a failed drip edge. Check soffit vents for rust staining from overflow. Rake edge damage appears as vertical water tracks on gable-end siding. These components show drip edge failures before roof damage becomes visible. They're early warning indicators requiring immediate attention.
How do gutters and downspouts depend on drip edge alignment for proper flow?
Gutters mount below drip edges, catching water that flows off the metal edge. Misaligned drip edge shoots water over, under, or behind gutters. Proper alignment puts the drip edge's lower leg directly over the gutter's back edge—water falls cleanly into the trough.
Check gutter positioning relative to the drip edge. Gutters mounted too low or too far from the fascia miss water flowing off the drip edge. Gutters too close allow capillary action to draw water backwards. The ideal gap is approximately one inch—close enough to catch water but far enough to prevent wicking.
What Visible Signs of Drip Edge Problems Can You Identify in Early Fall?
Ground-level observation reveals most drip edge problems. Use binoculars for close inspection without climbing. Look for patterns indicating systematic failure versus isolated damage.
How do lifted, bent, or separated metal sections indicate structural weakness?
Lifted drip edge shows gaps between the metal and the roof deck. Light visible through these gaps confirms separation. Bent sections indicate impact damage or fastener failure, allowing wind movement. Separated seams—where drip edge sections join—leave open channels for water entry.
Walk the home's perimeter, examining the roof edge from multiple angles. Morning or late afternoon light reveals lifted sections invisible at midday. Press gently on accessible edge sections—movement indicates loose fasteners. Any drip edge that moves requires refastening or replacement before winter.
What staining or streaking on the fascia shows water bypassing the drip edge?
Dark vertical streaks on the fascia directly below the roof edge prove water runs behind the drip edge instead of over it. These stains concentrate at fastener points where rust allows water through, or at seams where sections are separated. Fresh staining appears darker; old staining shows as faded lines.
Fascia staining progresses to soft spots, then rot. Press stained areas with a screwdriver—soft wood indicates advanced rot requiring fascia replacement along with drip edge repair. Catch problems at the staining stage before structural damage occurs.
How do gutter overflow patterns signal misalignment of the drip edge?
Water spilling over gutter fronts rather than flowing to downspouts indicates multiple possible problems. Misaligned drip edge shoots water beyond gutters. Lifted drip edge channels water backwards, missing gutters entirely. Bent sections create localised overflow points.
During fall rains, watch gutter performance. Water should flow smoothly to downspouts. Overflow, especially at specific points, indicates edge or gutter problems. Mark overflow locations for close inspection—these spots will create ice dams in winter when freezing temperatures arrive.
How Can Drip Edge Issues Lead to Winter Leaks, Ice Dams, and Structural Damage?
Minor fall drip edge failures become major winter problems. Understanding this progression helps prioritise repairs. Prevention costs far less than winter emergency repairs and secondary damage remediation.
How does a missing drip edge allow meltwater to wick into the roof decking?
A missing drip edge removes the barrier preventing capillary action. Meltwater flowing across shingles reaches the roof edge and wicks backwards into the decking rather than dripping free. Wood absorbs water readily—once saturated, rot begins within weeks.
Ice dams form when heat escaping from the attic melts snow on the upper roof, which then refreezes at the colder eaves, creating a barrier. Edge rot creates a perfect environment for ice dam water infiltration. Rotted decking loses fastener-holding power—shingles loosen, creating more entry points. The cycle accelerates without intervention.
How do poor edge drainage and roof-to-gutter gaps contribute to ice dams?
This barrier forces subsequent meltwater to back up and seep under shingles, leading to leaks and water stains on attic ceilings or walls. Water that should flow into gutters instead pools at the roof edges when the drip edge fails. This pooling freezes during cold nights, creating small dams that grow with each melt-freeze cycle.
Gaps between the roof edge and the gutter allow water to run down the fascia instead of into the drainage. This water freezes on fascia and soffit surfaces, creating icicles and ice buildup. The weight stresses gutters and edge components. Gutters pull away, worsening the gap and accelerating ice dam formation.
How can minor fall drip edge failures escalate into major winter repairs?
Heavy snow accumulation adds significant weight to the roof structure. A failed drip edge allows moisture infiltration. Wet roof decking loses strength. Snow load plus compromised decking equals potential structural failure.
A single loose drip edge section allows water entry at one point. That water travels along the roof deck, affecting areas far from the entry point. By spring, what appeared as isolated edge damage manifests as widespread decking rot, interior ceiling damage, and mold growth. Fall repairs prevent this cascade—winter conditions accelerate it beyond easy repair.
What Are the Main Steps to Complete a Fall Drip Edge Inspection in Illinois?
The best defense against Illinois' harsh winter is proactive maintenance performed in the fall. Preparing the roof before the first snowfall is key to preventing ice dams and structural damage. Systematic inspection ensures nothing is missed.
Step 1 – How should you prepare a safe fall inspection checklist for the roof perimeter?
Create a written checklist covering all roof edges—eaves, rakes, valleys, and penetrations. Gather tools: binoculars, camera, ladder, flashlight, and notepad. Check weather—inspect on dry, calm days for safety and visibility.
Plan the inspection route before starting. Work clockwise around the building. Photograph each elevation for reference. Note the time and date. This documentation becomes valuable if problems worsen or insurance claims arise. Preparation ensures thorough, safe inspection without repeated dangerous trips to problem areas.
Step 2 – How do you perform a ground-level evaluation for sagging, staining, or metal lift?
Walk the property perimeter, examining all roof edges from the ground. Use binoculars to inspect closely without climbing. Look for obvious problems: sagging sections, missing pieces, visible rust, fascia staining, and gutter misalignment.
Document every observation with photos. Note locations precisely—"south side, 10 feet from chimney" beats vague descriptions. Ground-level inspection catches 70% of problems safely. Only proceed to closer inspection for areas showing ground-visible issues or for comprehensive evaluation.
Step 3 – How should you inspect the drip edge directly along eaves and rakes?
Ensuring the drip edge is securely fastened and properly channels water is a simple yet vital step. Close inspection requires ladder access. Check fastener spacing—nails or screws should appear every 8-12 inches. Verify secure attachment by gently pressing sections—no movement should occur.
Inspect seams where drip edge sections join. Overlaps should run 2 inches minimum with water flowing over, not under, the seam. Check for rust at fastener points. Examine the lower leg—it should extend below the fascia, directing water into gutters. Bent or damaged sections need straightening or replacement.
Step 4 – How do you examine underlayment integration and fastener integrity?
Underlayment inspection requires lifting shingle edges carefully. Look for proper overlap—underlayment should extend over the drip edge by 3-4 inches minimum. Check for tears, gaps, or deterioration. The ice and water shield membrane should cover the drip edge in cold climates.
Fastener inspection reveals installation quality. Proper fasteners penetrate the decking adequately without over-driving. Over-driven fasteners create tears; under-driven ones allow movement. Rust staining around fasteners indicates corrosion-weakened holding power. Missing fasteners leave obvious holes requiring immediate attention.
Step 5 – How should you document findings and prioritize repairs before winter?
Photograph every problem area from multiple angles. Create a written report noting location, severity, and recommended action. Prioritize based on risk: active leaks first, structural issues second, and preventive repairs third.
Get professional estimates for needed work. Schedule repairs immediately—contractor availability decreases as winter approaches. For DIY repairs, complete work during warm, dry weather. Materials require specific temperature ranges for proper installation. Documentation supports insurance claims if storm damage worsens existing problems.
When Should You Repair Drip Edge vs. Replace It Before Winter Arrives?
Repair versus replacement decisions depend on damage extent and the material condition. Sometimes, partial repairs create problems worse than full replacement.
Which minor issues can be fixed with realignment, refastening, or sealing?
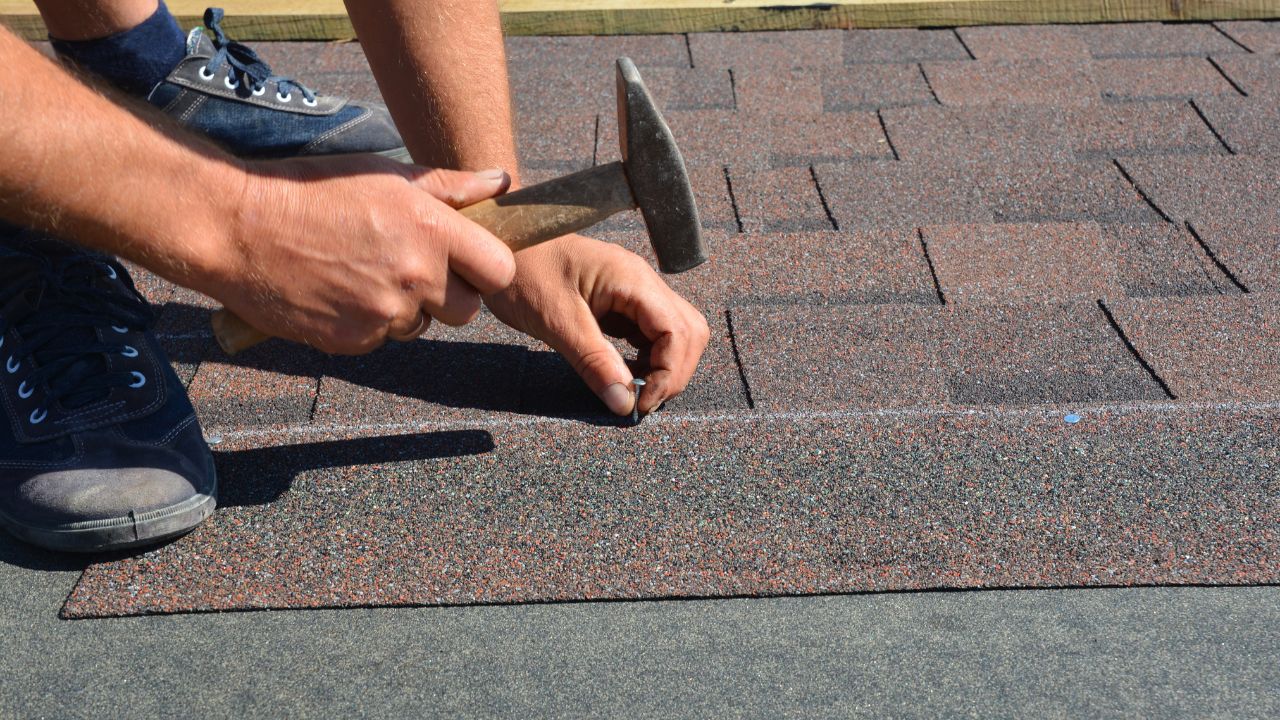
Loose sections with intact metal need refastening only. Add fasteners at proper spacing. Slightly bent sections straighten with careful pressure—avoid cracking paint or creating metal fatigue. Small gaps or cracks should be sealed with appropriate roofing sealant.
Seam separations under 2 inches are repaired with sealant and additional fasteners. Isolated rust spots without structural compromise are treated with rust converter and sealing. These repairs work when the base metal remains sound, and the overall system is intact. Minor repairs cost hundreds versus thousands for replacement.
Which signs indicate the need for full drip edge replacement?
Extensive rust compromising structural integrity requires replacement. Holes, tears, or severely bent sections can't be reliably repaired. Multiple failure points across large spans indicate systematic failure—patching won't last.
Drip edge over 20 years old or showing widespread fastener failure needs replacement. If fascia rot accompanies edge damage, both require replacement for proper integration. Mismatched repairs from previous work often necessitate complete replacement for consistent, reliable performance. Replacement costs more initially but prevents repeated repair cycles.
How do you judge when drip edge damage suggests broader roof-edge failure?
When the drip edge shows widespread problems, inspect the underlying components. Significant fascia rot indicates the problem exceeds simple flashing replacement. Water-damaged decking visible from the attic suggests long-term infiltration requiring comprehensive repair.
If shingles along edges show deterioration, curl, or lifting beyond normal aging, the edge system failed systemically. Multiple component failure—drip edge, fascia, soffit, and decking—demands professional assessment. Attempting piecemeal repairs risks missing hidden damage that will fail during winter stress.
When Should You Call a Roofing Professional for Drip Edge Assessment?
Professional assessment identifies problems invisible to homeowners and ensures repairs meet code and warranty requirements.
What conditions make DIY inspection insufficient or risky near the roof edge?
Steep roofs over 6/12 pitch require professional inspection—the fall risk is too high. Multi-story homes need proper fall protection equipment. Ice or frost on roofs makes climbing extremely dangerous—wait for professionals with proper equipment.
Complex roof geometries with valleys, dormers, and multiple pitch changes hide problems from ground observation. Previous storm damage may have compromised structural integrity making walking on the roof dangerous. If uncertain about what you're seeing, a professional assessment prevents misdiagnosis.
How can a professional identify hidden edge rot, underlayment exposure, or fastener failure?
Professionals use moisture meters to detect hidden water damage in fascia and decking. Infrared cameras reveal insulation voids and air leakage contributing to ice dams. They recognize subtle signs of improper installation invisible to untrained eyes.
Professional inspection includes attic evaluation showing water stains on the decking invisible from the outside. They test fastener integrity systematically, identifying widespread failures requiring full replacement. Professionals know code requirements and proper installation standards—homeowner inspections often miss these critical details.
Why is contractor evaluation essential if the roof has prior storm or water damage?
Prior damage creates hidden vulnerabilities. Professionals assess whether previous repairs were performed correctly. Storm-damaged roofs may have compromised structural elements appearing intact superficially.
Insurance claims often require professional documentation. Contractors familiar with insurance processes provide proper documentation supporting claims. They distinguish storm damage from maintenance neglect, protecting claim viability. Established local contractors understand regional weather patterns and common failure modes specific to Illinois conditions.
What Fall Maintenance Habits Keep the Drip Edge Winter-Ready Every Year?
Spring is primarily a damage assessment phase, while fall is a preventative maintenance phase. Consistent fall habits prevent winter emergencies and extend the roof system's lifespan.
How does gutter cleaning directly support drip edge performance?
Clean gutters allow proper water flow away from the roof edges. Clogged gutters create backups, forcing water behind the drip edge. Debris accumulation adds weight, pulling gutters away from fascia, breaking the drip edge-to-gutter seal.
Fall gutter cleaning removes leaves, granules, and debris before freezing. Clean spring and fall—once after leaves drop, once after spring pollen and seed drop. Gutter guards reduce but don't eliminate cleaning needs. Clean gutters directly correlate with drip edge longevity—blocked drainage destroys edge systems faster than weather alone.
How often should homeowners check fascia, soffits, and rake edges in the fall?
Annual fall inspection catches problems before winter. Check more frequently if your area experiences severe weather or if the roof is more than 15 years age. Look for new staining, paint failure, or soft spots indicating developing rot.
Quick visual inspections take 15 minutes quarterly. A detailed annual inspection requires an hour for thorough evaluation. Homes with known drainage issues or past problems need semi-annual checks—spring and fall. Regular monitoring establishes baselines, helping identify changes quickly.
How can pairing drip edge checks with yearly roof inspections reduce winter repairs?
Comprehensive annual roof inspections naturally include drip edge evaluation. Professionals checking shingles, flashing, and ventilation evaluate edge systems simultaneously. This integrated approach catches interactive problems—poor ventilation causing ice dams, stressing drip edges.
Scheduled annual inspections cost less than emergency repairs. They establish documentation timelines for insurance and resale. Consistent professional evaluation provides expert eyes to catch subtle deterioration before failure. Annual inspection paired with immediate repairs prevents the damage cascade turning minor issues into major expenses.
What Key Drip Edge Checks Should Illinois Homeowners Repeat Before Every Winter?
Seasonal checks establish patterns predicting failure. Consistent monitoring provides early warning before catastrophic problems develop.
Which recurring fall indicators predict winter roof-edge failure?
Repeated minor staining appearing each fall indicates chronic infiltration requiring correction. Progressive fascia deterioration—each year slightly worse—shows edge system failure. Ice formation in the same locations each winter indicates persistent heat loss or drainage problems.
Gutter overflow at specific points every rain event demonstrates misalignment or inadequate drainage capacity. Icicle formation patterns repeat annually, marking problem zones. Document these patterns photographically—progression evidence supports repair decisions and insurance claims when minor problems become major failures.
How do consistent annual inspections help prevent leaks, ice dams, and structural damage?
Annual inspection catches damage at early stages when simple repairs suffice. Small cracks sealed today prevent major leaks tomorrow. Loose fasteners tightened prevent complete separation. Early detection saves thousands compared to emergency winter repairs.
Documented inspection history proves maintenance diligence for insurance claims and home sales. Consistent care extends the roof system's lifespan by decades. Prevention costs pennies per day versus thousands for major repairs. Annual inspection is insurance against catastrophic failure—a small investment, massive protection.
Protect Your Roof's Critical Edge System This Fall
Drip edge failure cascades rapidly from minor nuisance to major structural damage. Don't wait until winter storms expose vulnerabilities. Advanced Roofing Inc. provides comprehensive fall inspections covering drip edge, flashing, gutters, and all edge components. Our experienced team identifies problems early and completes repairs before winter weather makes work dangerous and expensive.
Schedule your fall drip edge inspection with Advanced Roofing Inc. today. We'll evaluate your entire edge system, provide detailed documentation, and complete necessary repairs while the weather permits proper installation. Protect your investment—prepare your roof for Illinois winter now.